
Shoe Photography - ‘How-To’ and Behind the Scenes
February 13, 2018Hello and welcome to the blog. My name is Adam and I am commercial photographer based in Edmonton.
One of the greatest attributes a commercial product photographer can have is the ability to problem solve. It’s critical on set during the shoot, and just as important in pre-production phase when deciding how to showcase a product in an interesting and unusual way. Today we’re talking about shoes and more specifically about how this image came to life.

Above, is an absolutely stunning pair of Chelsea boots by Rampage. This image took about 6 hours of prep and photography to make, and then an additional 4 hours of Photoshop to really bring to life.
When previsualizing the concept for this image, I wanted to capture these boots in a very clean and controlled way. This eventually led to me imagining a scene like something almost out of a museum. The astro-turf acting as the pedestal, because well you know, feet often lead the shoes onto grass. The main light coming from above, creating great shape and form on the boots themselves, in perhaps somewhat of a holy way. And finally, a spotlight background light – the shoes are the star of the image after all.
To float anything in an image takes a bit of planning, ingenuity, and physics. It’s certainly something that can’t be done quickly as every product is different and finding ways of securing the product to the object that will float will always be different. This is due to the size of the product, the weight distribution and what’s parts of the product the camera sees and what parts it doesn’t - this last point is very important when it comes to the Photoshop job.


Here, I used a combination of rods, duct tape, fishing line and magic arms to support the boots in the way that I did. This hands down was the most tedious process of the image. To float them and get them in the exact perfect place took me nearly two hours. But oh man, once they are right… !!! Just don’t walk into the fishing when lighting! (he he)
The next part, and arguably the most important part of any product, or even commercial image, is the lighting. You can have the most elegant product, but if the lighting doesn’t do it justice, the product will not look good, and consequently, it will not sell. I used a combination of 4 lights consistently flashing in this scene, then captured 4 additional exposures using ‘painting with flash’ technique. These were to highlight the heels and the sides of the astro-turf.


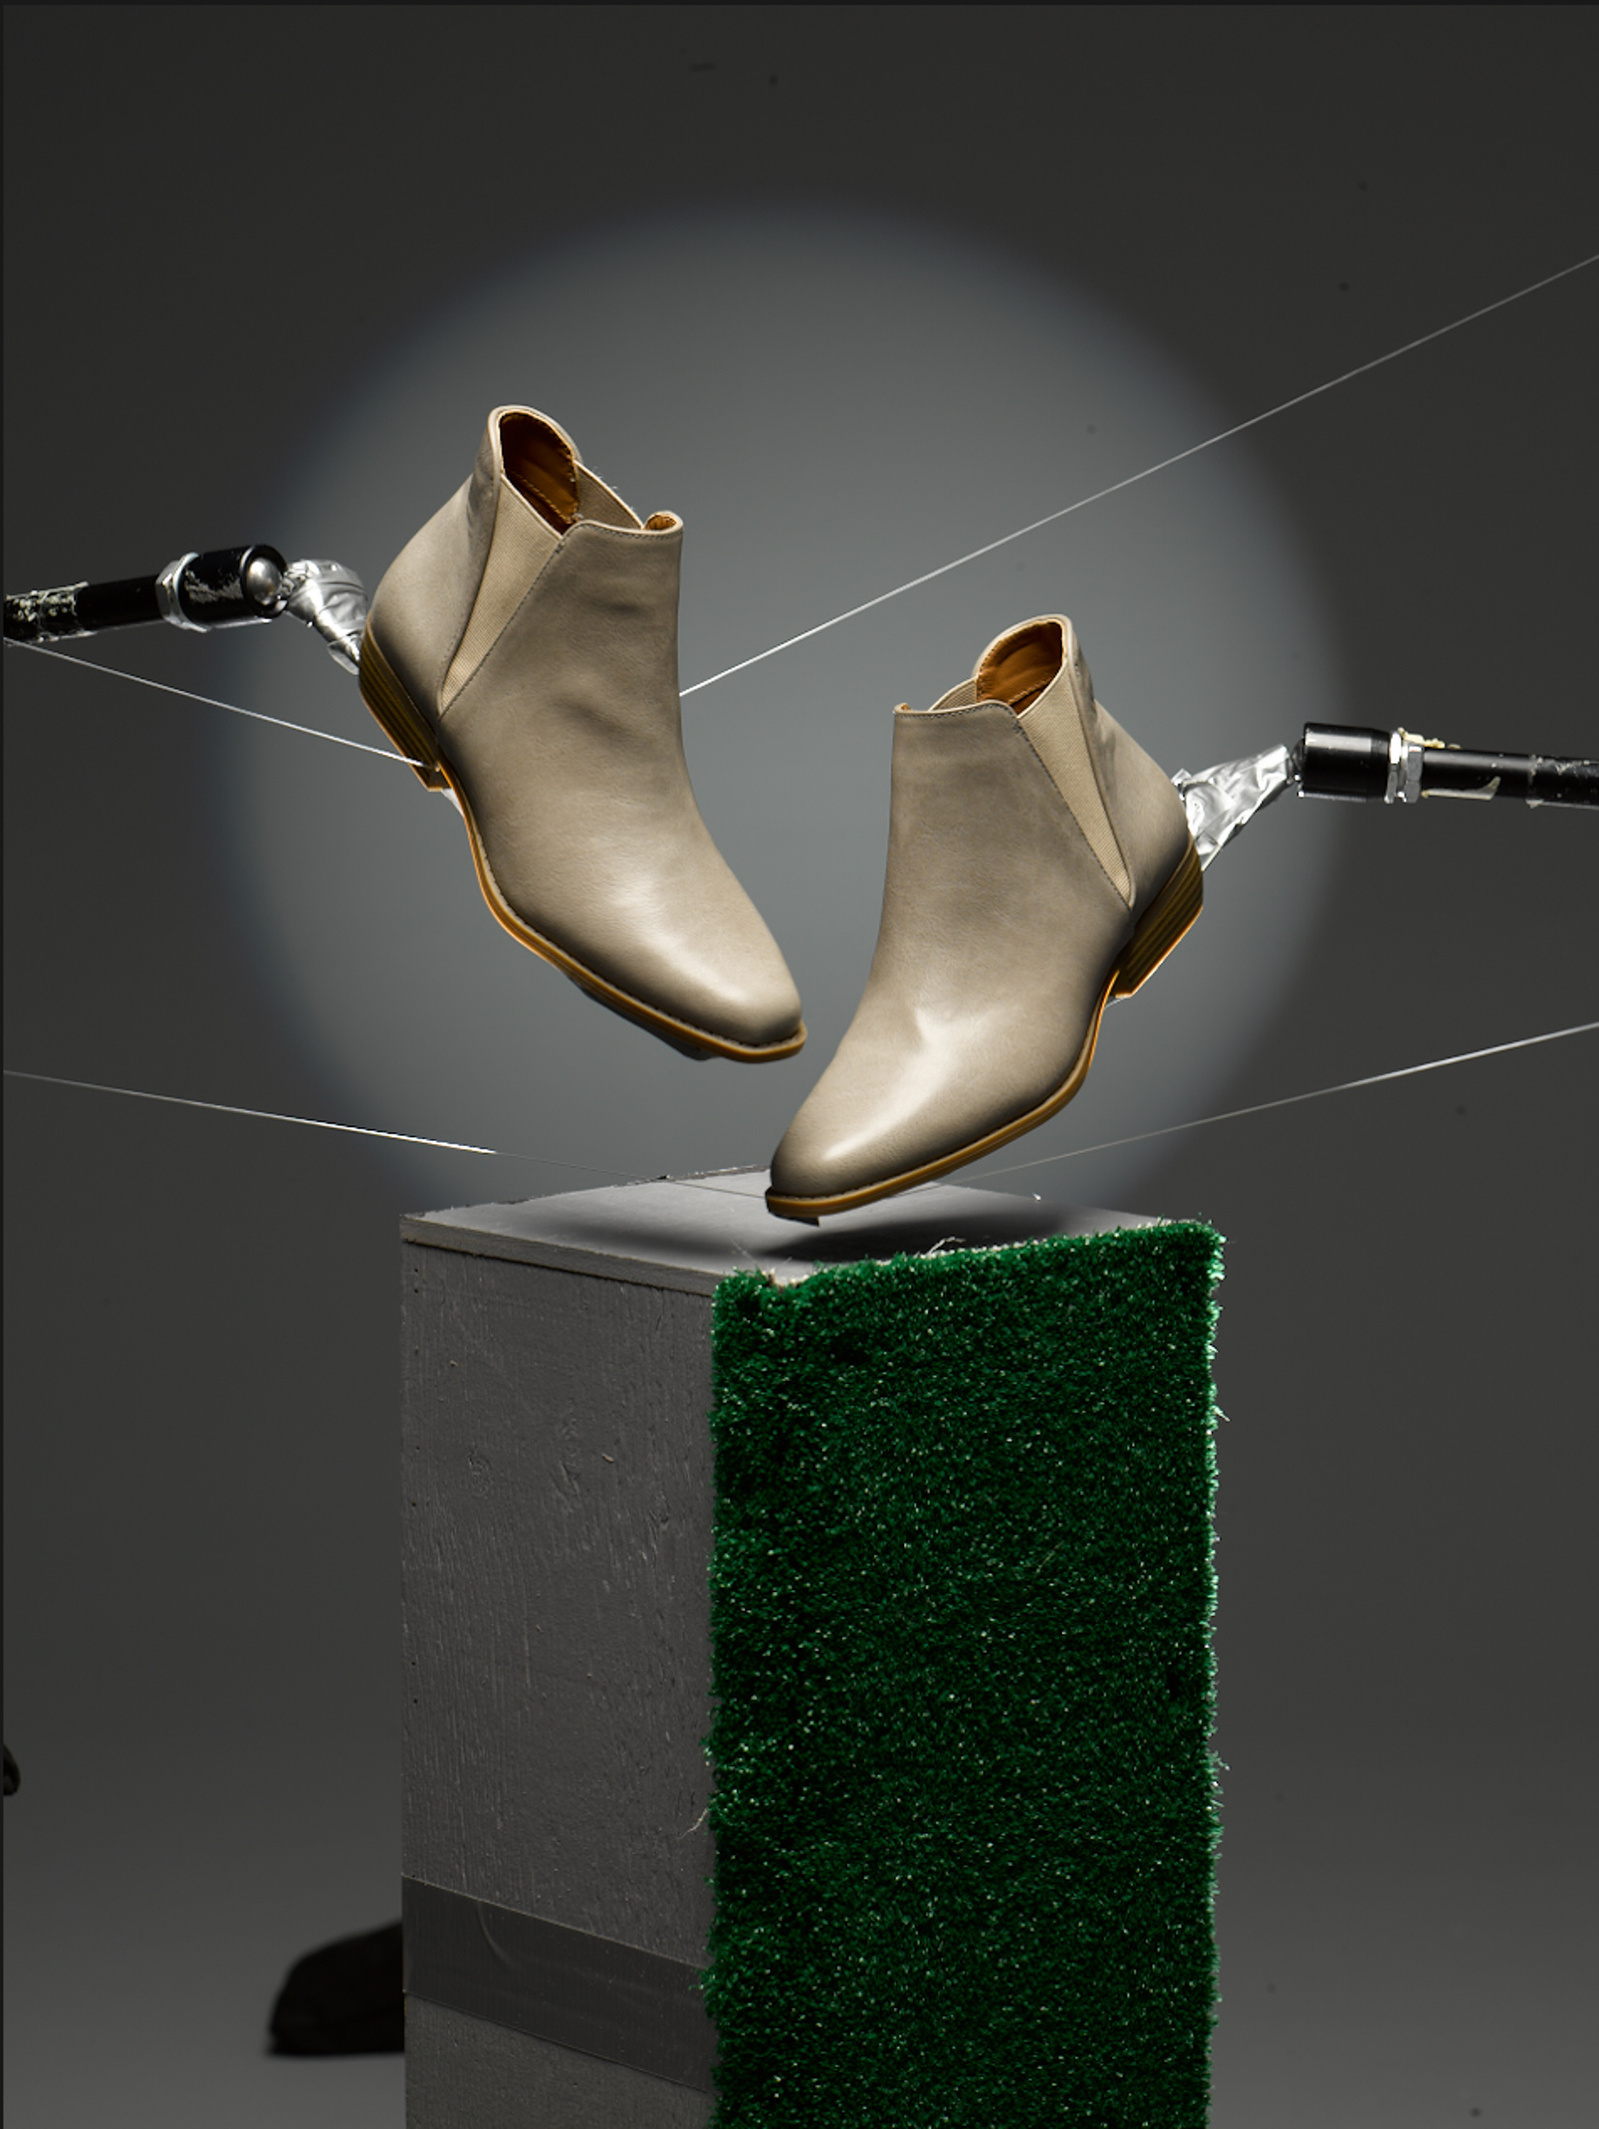


Next came the Photoshop job. When creating a composite image, it is very important to capture what is called a ‘clean plate’. Essentially this is an image with all/most/some objects removed from the frame. With that image, one is able to use it in order to remove any parts from the main image that are there solely to build the final image. In this case, I used it to remove the fishing wire and magic arms holding the boots. Below is a fun GIF of the image building up to the final image.

And there we go! A How To/BTS product image of a Rampage Chelsea boot.
Thanks for your time. Goodbye!
Adam